If you want to use your own domain as your handle on BlueSky (bsky.app), it’s quite easy. There are already plenty of tutorials out there if you want to do it through the DNS Panel, but what if you don’t want to mess with DNS settings and would rather just upload a simple file to your site?
This tutorial is for exactly that.

1. Click into “Settings”.
2. Click into “Account.”

3. Click into “Handle”.

4. Click “I have my own domain”.

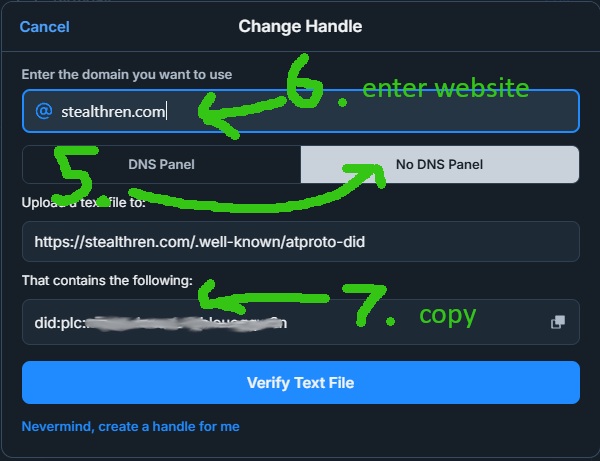
5. Click “No DNS Panel”.
6. Enter your web domain in the box.
7. Copy your unique code.

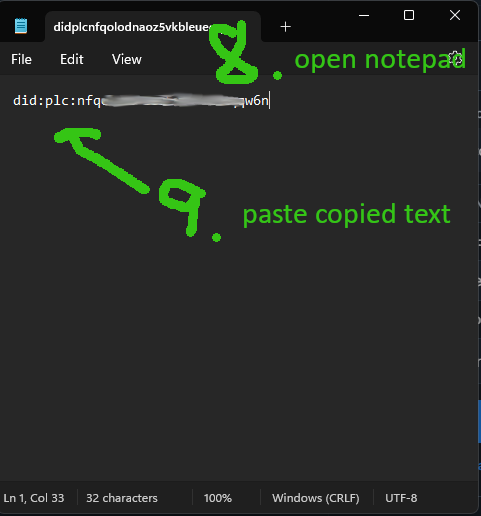
8. Open up Notepad app.
9. Paste your own unique code.

10. In the Notepad App click File -> Save as
11. Change the Save as type to “All files (*.*)”
12. Type the name in as: atproto-did.
include the ending period, but no file extension.
13. Click Save (and remember where you saved it)

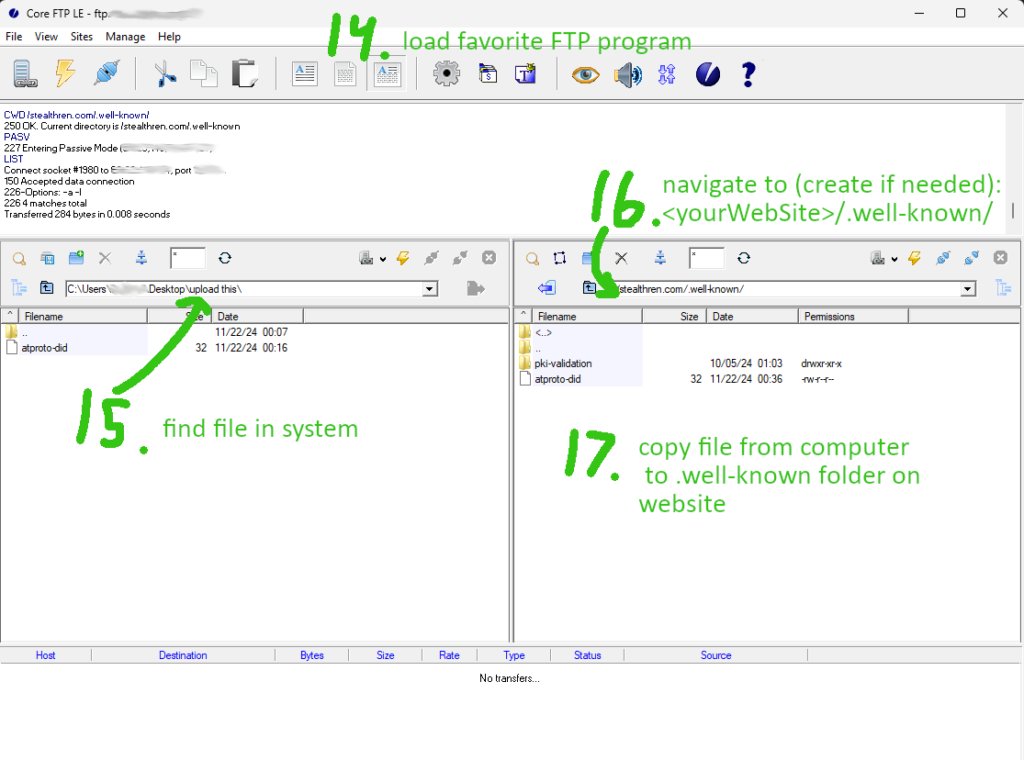
14. Load up your favorite FTP program, I’m using Core FTP LE
15. Find the atproto-did file in your system
16. Go to <yourDomain>/.well-known/
17. Copy the file from your computer to the .well-known directory on your domain. If it has a file extension, you’ve done it wrong, but can actually rename it through the FTP client to erase the extension.

18. Go back to your web browser and Click “Verify Text File”

19. Confirm that the domain was verified.
20. Click “Update to <yourDomain>”
And there you have it. You will now have a custom handle that works a lot like a verification check on other platforms.